Getting Started
Install sight·line and run your first behavioral observation in under a minute.
On this page (9)
sight·line is a desktop app for systematic behavioral observation and data collection. It supports all eight standard observation methods used in FBAs, evaluations, and ABA practice.
All data stays on your machine. There are no accounts, no cloud dependency, and no student information leaves your device unless you choose to export it. Built with school privacy requirements in mind.
Install sight·line
- Go to sight-line.app/download and download the installer for your platform (macOS Apple Silicon, macOS Intel, or Linux AppImage). A web version is also available if you prefer not to install anything.
- Open the installer and follow the prompts. Installation takes under a minute.
- Launch sight·line. You’ll land on the Student Picker screen — your home base.
Activate your license
sight·line works immediately on the Free tier, which allows one student. To unlock unlimited students, go to Settings and enter your license key.
- Free — 1 student, all observation methods
- Pro — unlimited students
- Pro+AI — unlimited students plus AI-powered analysis and narrative drafting
If you don’t have a license key yet, you can still follow every step below with one student.
The in-app checklist
When you first open sight·line, a Getting Started checklist appears on the Student Picker screen. It tracks five milestones:
- Add a student
- Run a session
- View results
- Export a report
- AI summary
A progress bar fills in as you complete each milestone. The checklist disappears automatically once you finish all five steps (or once you have six or more students). You can follow along with the checklist as you work through the steps below.
Try demo mode first (optional)
If you want to explore the app before entering real data, turn on demo mode. Go to Settings > Data Management and enable it. sight·line loads pre-built sample data — students, sessions, and results — so you can click through every screen and see what the app looks like in practice. Your real data is hidden while demo mode is active, and nothing is lost when you turn it off.
Step 1: Add a student
From the Student Picker screen, tap the + button. Enter the student’s name and press Enter. A new student card appears on screen.
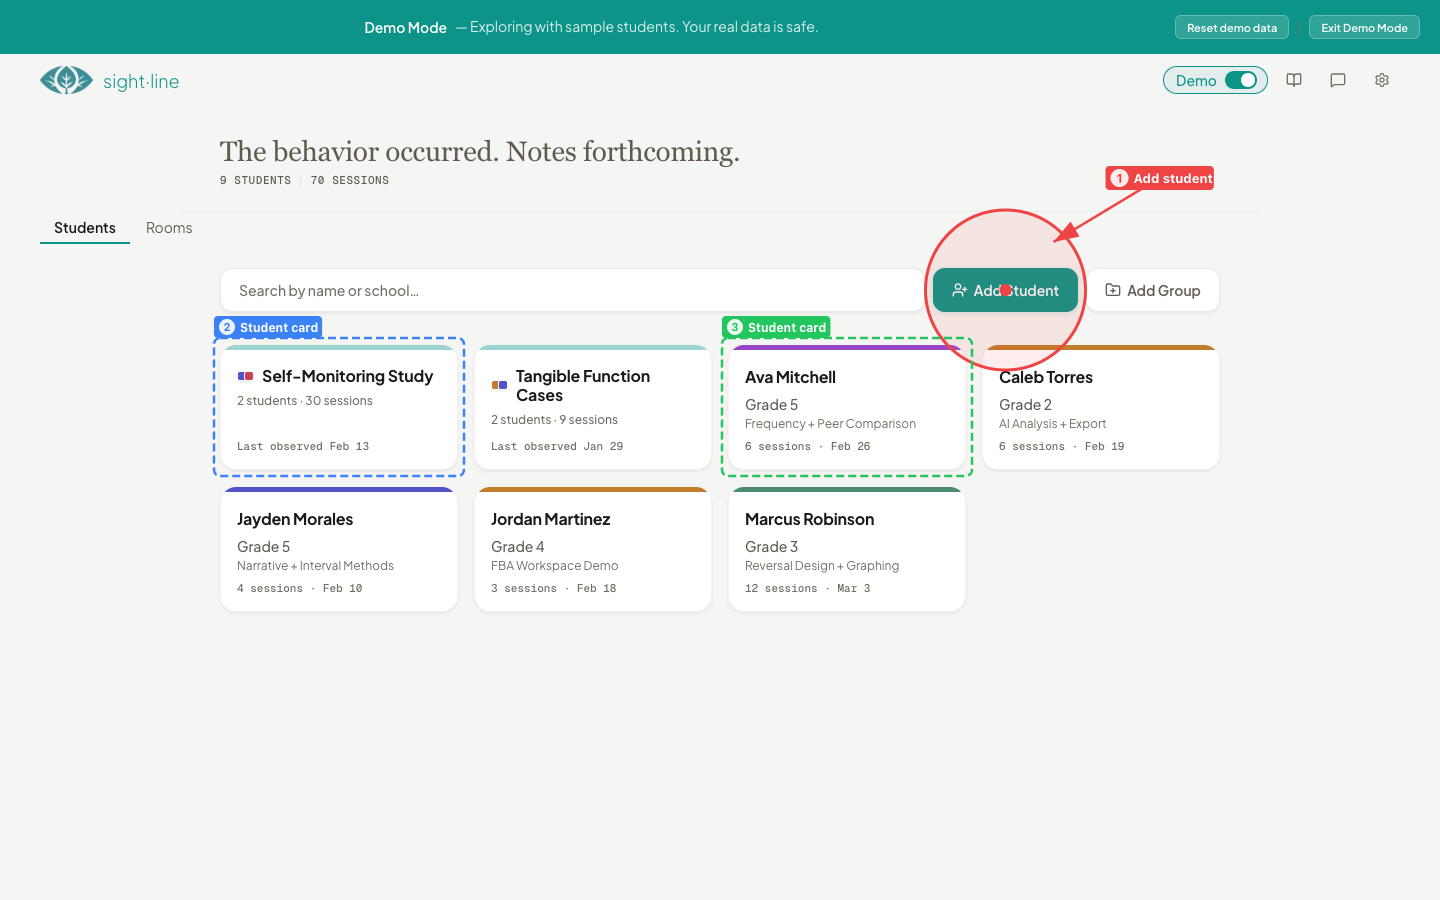
As you add more students, you can organize them into groups by dragging cards around. But for now, one student is all you need.
Step 2: Set up your first observation
Tap the student card to open the Student Hub. This is the main workspace for each student — it shows session history, available actions, and an insights panel.
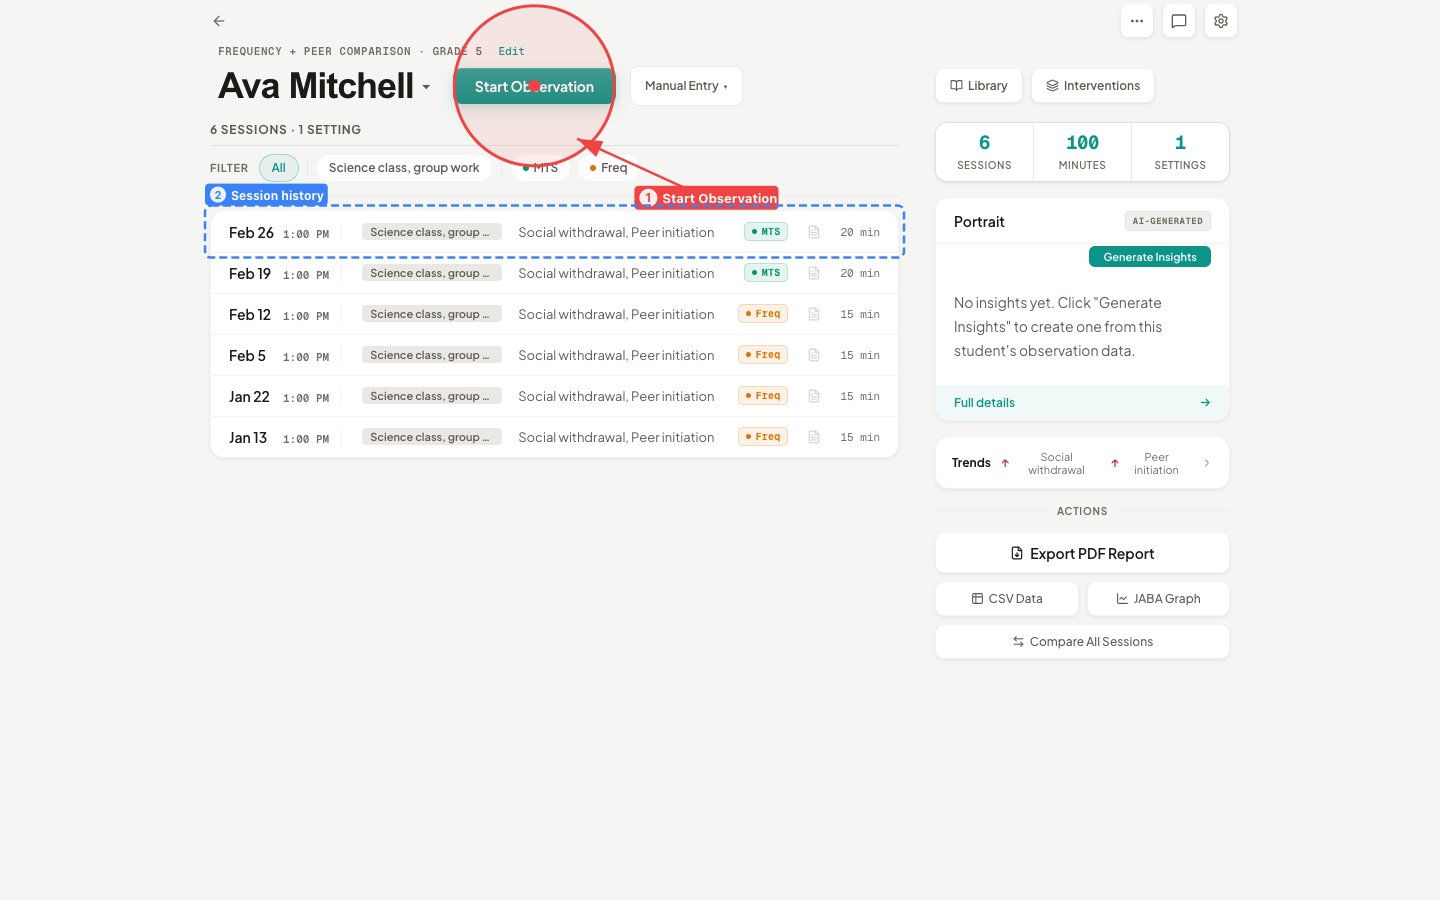
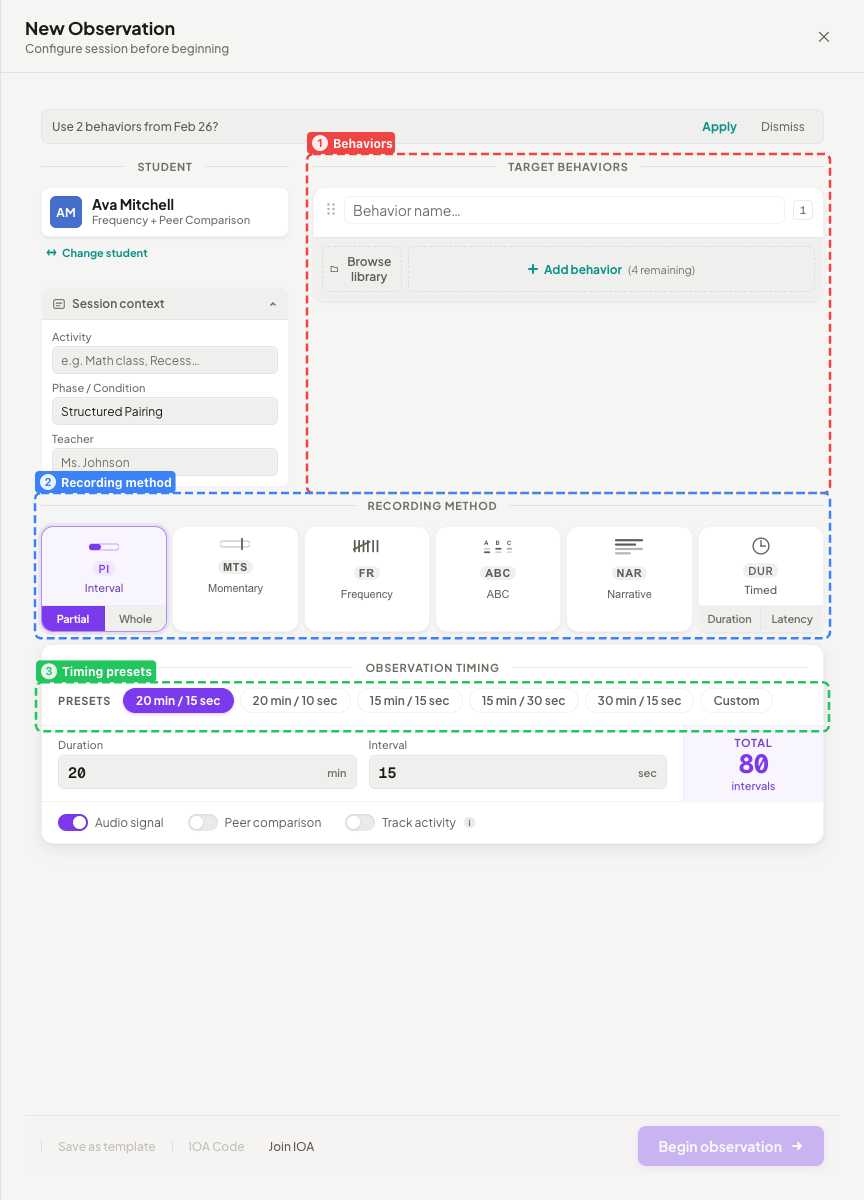
Tap Start Observation to open the Setup screen. Here you configure everything about the observation before you start recording:
-
Pick your method. Choose from the eight observation methods shown in a grid:
- Whole Interval
- Partial Interval
- Momentary Time Sampling
- Frequency / Event Recording
- ABC / Narrative Recording
- Narrative Recording
- Duration Recording
- Latency Recording
Not sure which to pick? See Observation Methods for guidance on when to use each one. For your first session, Frequency / Event Recording or Partial Interval are good starting points.
-
Add behaviors. Enter a name for each behavior you want to track (for example, “Hand raising” or “Off-task”). You can add an optional definition for each one. If you’ve observed this student before, the app offers to reuse the same behaviors from your last session.
-
Set timing. Choose a timing preset (such as 20 minutes with 15-second intervals) or create a custom configuration. For duration and latency recording, timing works differently — see Recording for details.
-
Optional settings. You can add a phase label (like “Baseline” or “Intervention”), select an ABC tag set, enable activity tracking, or enter an IOA session code for interobserver agreement. None of these are required for your first session.
When you’re ready, press Start (or use the keyboard shortcut Cmd+Enter).
Step 3: Record the observation
The recording screen appears with controls matched to your chosen method. Use on-screen buttons or keyboard shortcuts to record as you observe.
For details on how each recording method works during a live session, see Recording.
If something goes wrong
If the app closes unexpectedly during a recording (crash, accidental quit, laptop restart), don’t worry. The next time you open the Setup screen for that student, you’ll see a recovery banner: “Interrupted session found” with options to Resume or Discard. Your data is not lost.
Step 4: View your results
When you stop the recording, sight·line takes you to the Results screen. You’ll see:
- Summary statistics for each behavior (rates, percentages, durations)
- Charts and visualizations of the session data
- A breakdown by interval or time period
From the Results screen you can export a report as a PDF — which completes the fourth milestone on your checklist. See Results for a full walkthrough of everything available on this screen.
Step 5: Try AI analysis
If you’re on the Pro+AI tier, sight·line can generate a narrative summary of your observation data. This is the fifth and final milestone on the Getting Started checklist.
To set up AI features, see AI Setup. You can use a cloud provider (OpenAI, Anthropic, or Google Gemini) or run a local model entirely on your machine.
What to explore next
You’ve completed the Getting Started checklist. Here are the features worth exploring as you settle into your workflow:
- Observation Methods — learn when and how to use each of the eight recording types
- Recording — keyboard-driven workflow, live controls, and tips for efficient data collection
- Results — charts, statistics, and export options
- AI Setup — configure AI for narrative drafting and data analysis
- Keyboard Shortcuts — speed up recording with hotkeys
- Settings — customize timing defaults, manage data, and configure your license